Lab for week-5
Apply lab-5 rotation and translation to selfie dog.
Press key 2 - rotate clockwise about 10-degrees.
Press key 3 - rotate counter-clockwise about 10-degrees.
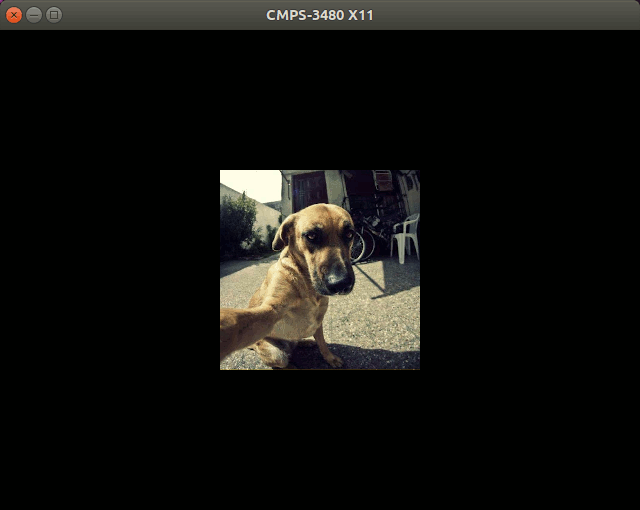
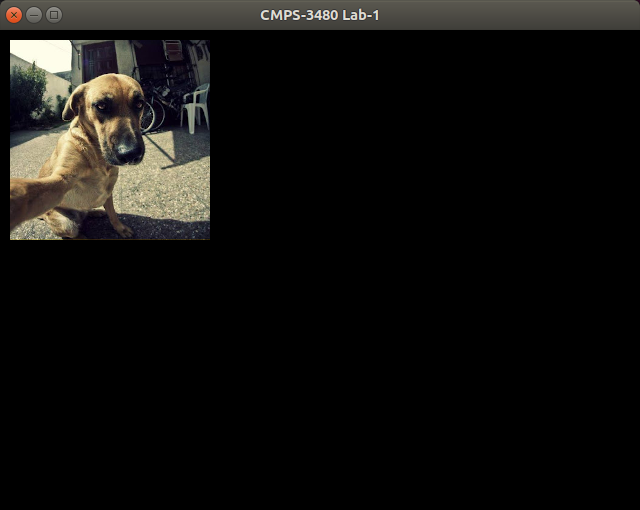
Put selfie dog in the middle of the screen.
Choose your own exact angle of rotation, but make it an
angle in degrees, then convert it to radians.
To produce the rotations below,
I pressed the keyboard keys like this: 2 2 2 3 3 3 3 2
 Object space:
In previous lab-1...
we were displaying the image with its origin at the upper left corner.
Center the image in its object space by translating it up and left.
To do this...
subtract half the image width and height from each pixel.
Rotation:
Rotate each image pixel's position just before drawing it.
Use a rotation matrix from our lab5.cpp.
Translate to center:
Translate the image to the window center by adding half the
window width and half the window height to each pixel position.
I programmed the rotations above in a short time just like we did in
lab5.cpp. Use the matrix and matrix multiply.
Object space:
In previous lab-1...
we were displaying the image with its origin at the upper left corner.
Center the image in its object space by translating it up and left.
To do this...
subtract half the image width and height from each pixel.
Rotation:
Rotate each image pixel's position just before drawing it.
Use a rotation matrix from our lab5.cpp.
Translate to center:
Translate the image to the window center by adding half the
window width and half the window height to each pixel position.
I programmed the rotations above in a short time just like we did in
lab5.cpp. Use the matrix and matrix multiply.
Here is the code from Monday class.
Mon Sep 28, 9:00
It rotates selfie dog.
Remember,
for the assignment selfie dog must rotate
in the middle of the window, when keys are pressed.
for(int i=0;ii<h;i++) {
for(int j=0;j<w;j++) {
x11.set_color_3i(*(p+0),*(p+1),*(p+2));
p+=3;
//temporary variables for the pixel location
double x = j+10;
double y = i+10;
//define the angle of rotation
static double angle = (-30.0 / 360.0) * (2.0 * 3.14159);
//build a rotation matrix
double mat[2][2] = { cos(angle), -sin(angle), sin(angle), cos(angle) };
//determine the transformed point
double tx = x * mat[0][0] + y * mat[0][1];
double ty = x * mat[1][0] + y * mat[1][1];
x11.drawPoint((int)tx, (int)ty);
}
}
Here is the code from our lab-5...
Tue Sep 22, 7:20am
Here is the render function...
void render()
{
x11.clear_screen();
x11.set_color_3i(255,255,255);
//define object - in object space
int pt[4][2] = { 0,0, 20,0, 20,20, 0,20 };
//translation to "screen space" - addition
for (int i=0; i<4; i++) {
pt[i][0] -= 10;
pt[i][1] -= 10;
}
//transformation of the points
//translation, rotation, scaling - affine transformations
//scale is multiplication
for (int i=0; i<4; i++) {
pt[i][0] *= 4;
pt[i][1] *= 4;
}
//rotation is a matrix operation
static double angle = (45.0 / 360.0) * (2.0 * 3.14159);
//double mat[2][2] = { 1.0, 0.0, 0.0, 1.0 };
double mat[2][2] = { cos(angle), -sin(angle), sin(angle), cos(angle) };
for (int i=0; i<4; i++) {
double tx = pt[i][0] * mat[0][0] + pt[i][1] * mat[0][1];
double ty = pt[i][0] * mat[1][0] + pt[i][1] * mat[1][1];
pt[i][0] = tx;
pt[i][1] = ty;
}
angle = angle + 0.001;
usleep(100);
static double pos[2] = { 100.0, 200.0};
static double vel[2] = { 0.0, 0.0};
vel[1] += 0.001; // gravity
pos[0] = pos[0] + vel[0];
pos[1] = pos[1] + vel[1];
if (pos[1] > g.yres) {
pos[1] = g.yres;
vel[1] = -vel[1];
}
//translation to "screen space" is addition
for (int i=0; i<4; i++) {
pt[i][0] += pos[0];
pt[i][1] += pos[1];
}
//now draw
for (int i=0; i<4; i++) {
int j = (i+1) % 4;
drawBresenhamLine(pt[i][0],pt[i][1], pt[j][0],pt[j][1]);
}
}
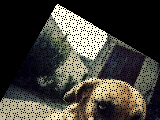
Fix the image
Here is part of the selfie dog rotated 30°

The image has artifacts that occur where no pixel is drawn.
They are blank spots.
This is also a Moire pattern.

This happens because we are moving pixels to a new location based on
floating-point calculations. The floating-point location of each pixel must be
converted to integers. Rounding during the conversion can cause 2 pixels to be
drawn in the same location.

Your job is to fix this. Look below.


Method 1:
Instead of moving each pixel to a 'rotated' position, for each pixel, rotate
backwards to see where the pixel color should come from.

Be sure to check if the location is within the image boundries. If not, draw
a black or other color to indicate a background.

Method 2:
For each pixel drawn, draw the 4 neighboring pixels above, below, at left, and
at right, the same color. This is easy and looks pretty good.
Method 1:
Instead of moving each pixel to a 'rotated' position, for each pixel, rotate
backwards to see where the pixel color should come from.
Be sure to check if the location is within the image boundries. If not, draw
a black or other color to indicate a background.
Method 2:
For each pixel drawn, draw the 4 neighboring pixels above, below, at left, and
at right, the same color. This is easy and looks pretty good.
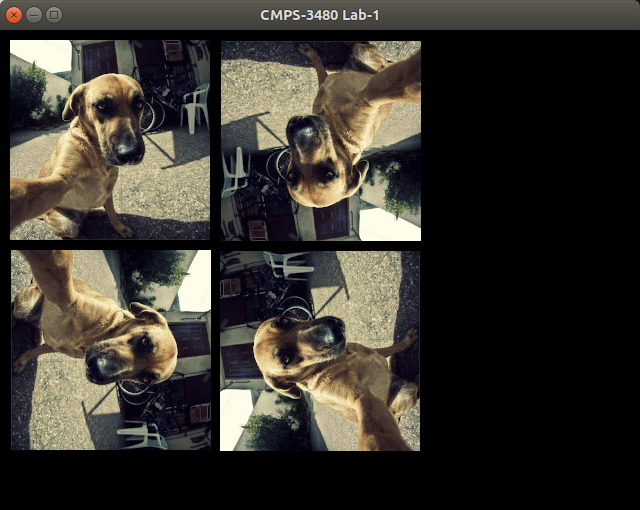
Step 3:
Rotate the images.

This is still on key press '1'.

The image at lower left will be rotated 90-degrees clockwise.
The image at upper right will be rotated 180-degrees.
The image at lower right will be rotated 270-degrees clockwise.

Selfie dog is rotating around.

Gordon will help you get the first rotation done.


Source code written in class:

#include <iostream>
#include <fstream>
using namespace std;

unsigned char *get_image_stream(const char *fname, int *w, int *h) {
    ifstream fin(fname);
    char P, six;
    fin >> P >> six;
    cout << "P: " << P << "  six: " << six << endl;
    int width, height, max;
    fin >> width >> height >> max;
    cout << width << "x" << height << endl;
    unsigned char *data = new unsigned char [width * height * 3];
    fin.read((char *)data, width*height*3);
    fin.close();
    *w = width;
    *h = height;
    return data + 1;
}

void render() {
    x11.clear_screen();
    if (g.state[1]) {
        //draw dog image
        int w, h;
        unsigned char *data = get_image_stream("lab1.ppm", &w, &h);
        unsigned char *p = data;
        for (int i=0; i<h; i++) {
            for (int j=0; j<w; j++) {
                x11.set_color_3i(*(p+0), *(p+1), *(p+2));
                p += 3;
                x11.drawPoint(j+10, i+10);
            }
        }
        p = data;
        for (int i=0; i<h; i++) {
            for (int j=0; j<w; j++) {
                x11.set_color_3i(*(p+0), *(p+1), *(p+2));
                p += 3;
                x11.drawPoint(200-i+10, j+220);
            }
        }
        p = data;
        for (int i=0; i<h; i++) {
            for (int j=0; j<w; j++) {
                x11.set_color_3i(*(p+0), *(p+1), *(p+2));
                p += 3;
                x11.drawPoint(j+430, i+10);
            }
        }
    }
    return;
}
Source code written in class:
#include <iostream>
#include <fstream>
using namespace std;
unsigned char *get_image_stream(const char *fname, int *w, int *h) {
ifstream fin(fname);
char P, six;
fin >> P >> six;
cout << "P: " << P << " six: " << six << endl;
int width, height, max;
fin >> width >> height >> max;
cout << width << "x" << height << endl;
unsigned char *data = new unsigned char [width * height * 3];
fin.read((char *)data, width*height*3);
fin.close();
*w = width;
*h = height;
return data + 1;
}
void render() {
x11.clear_screen();
if (g.state[1]) {
//draw dog image
int w, h;
unsigned char *data = get_image_stream("lab1.ppm", &w, &h);
unsigned char *p = data;
for (int i=0; i<h; i++) {
for (int j=0; j<w; j++) {
x11.set_color_3i(*(p+0), *(p+1), *(p+2));
p += 3;
x11.drawPoint(j+10, i+10);
}
}
p = data;
for (int i=0; i<h; i++) {
for (int j=0; j<w; j++) {
x11.set_color_3i(*(p+0), *(p+1), *(p+2));
p += 3;
x11.drawPoint(200-i+10, j+220);
}
}
p = data;
for (int i=0; i<h; i++) {
for (int j=0; j<w; j++) {
x11.set_color_3i(*(p+0), *(p+1), *(p+2));
p += 3;
x11.drawPoint(j+430, i+10);
}
}
}
return;
}
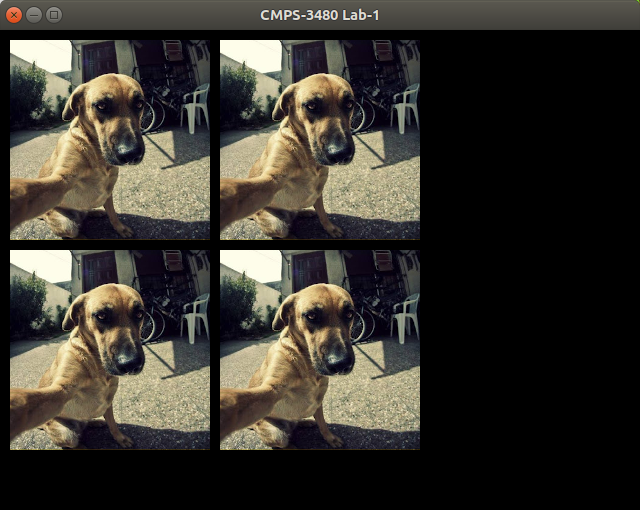
 Then put 4 images in place.
The same image drawn 4 times.
Then put 4 images in place.
The same image drawn 4 times.