CMPS-3480 Computer Graphics
Lab-3
Overview:
In this lab, we will:
- draw pixels at random locations
- define implied shapes
- fill shapes with color
- calculate PI
- fill a triangle using 3 half-spaces
- fill using a procedural texture
Step 1:
Please do these steps to prepare for coding...

1. Log into Odin, using the -YC options.
   example: ssh myname@odin -YC

2. Change to your 3480/3/ folder.

Copy the lab files now...
cp /home/fac/gordon/p/3480/code/lab3/* .

Compile and run the program:
make
./lab3

Modify your Makefile so the compiler uses -Wall option.
Step 2:
Follow along on the big screen to begin this lab.
We will add one or more program features together.
You will then add some features yourself.

The following features are already listed in the program menu.

Adjust your menu numbers to match the order below.

 .  #2 fill a disk (circle)
 .  #3 fill a ring
 .  #4 fill a rectangle
 .  #5 calculate PI by inscribing a circle within a square
 .  #6 fill screen with checkerboard pattern
 .  #7 fill triangle using 3 half-spaces
 .  #8 fill triangle using odd-even method
 .  #9 RGB gradient colored triangle using barycentric coordinates
 . #10 fill triangle with a texture-map using barycentric coordinates

For the lab, you should try to do a few from step-3 and do step-4.
A few more features will be added for homework.
Step 3:
fill a disk
. define g.center[2] and g.radius
. find distance from point to center
. compare distance to radius, and set the color
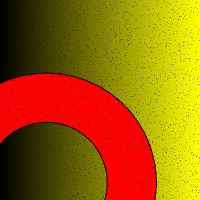
fill a ring
. define g.center[2] and g.min_radius, g.max_radius
. find distance from point to center
. compare distance to min_radius and max_radius
. set a color if between radii
fill a rectangle
. define g.center[2], g.width, g.height
. find horizontal distance from point to center
. find vertical distance from point to center
. compare distances to width and height
. set a color if within
calculate PI
. define your window size to be square in shape
. define a circle that inscribes the square
. start filling with pixels
. keep a count of all pixels
. keep a count of pixels inside the circle
. pi = 4.0 * circle_pixels / all_pixels
. at intervals, display pi on your console with printf
. link
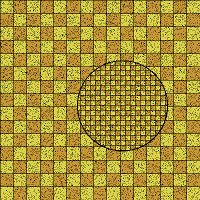
fill window with a checkerboard texture (procedural texture)
. define a width and height of each checkerboard tile
. start filling with pixels
. check each pixel to see if it is on a white or black tile
. try to do the calculation yourself
try this...
1 - divide pixel x by width
2 - check if even/odd
3 - divide pixel y by height
4 - check if even/odd
5 - are they the same or different?
6 - set the color
Step 4
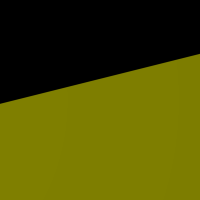
Fill a triangle using 3 half spaces method.
| space-1 |
space-2 |
space-3 |
combined |
 |
 |
 |
 |
| Notice how 3 spaces overlap to form a triangle in the middle. |
Generate 3 random points that will be the 3 vertices of your triangle.
Then follow the process below to determine inside/outside the triangle.
Add this to your Global class: double tri[3][2];
This array will hold your 3 triangle vertices.
Generate the vertices randomly.
Here is the process...
1. Build a vector from triangle vertex 0 to 1
(subtract vertex 0 from vertex 1)
name it v0
2. Build a vector perpendicular to v0
name it v1
3. Build a vector from triangle vertex 0 to your point
name it v2
4. Find the dot-product of v1, v2
name it dot
5. Add the sign of dot to a sum (negative 1 or positive 1)
6. Repeat from step 1 for the two other triangle sides
7. If the absolute-value of sum is 3,
the point is inside the triangle.
function to calculate a perpendicular vector...
void getPerpendicular(double *v1, double *v2)
{
//return in v2 a vector that is perpendicular to v1.
//1. exchange x with y.
//2. change the sign of one component.
v2[0] = v1[1];
v2[1] = -v1[0];
}
function to calculate a dot product...
double getDotProduct(const double *v1, const double *v2)
{
//return a scalar.
return (v1[0] * v2[0] + v1[1] * v2[1]);
}
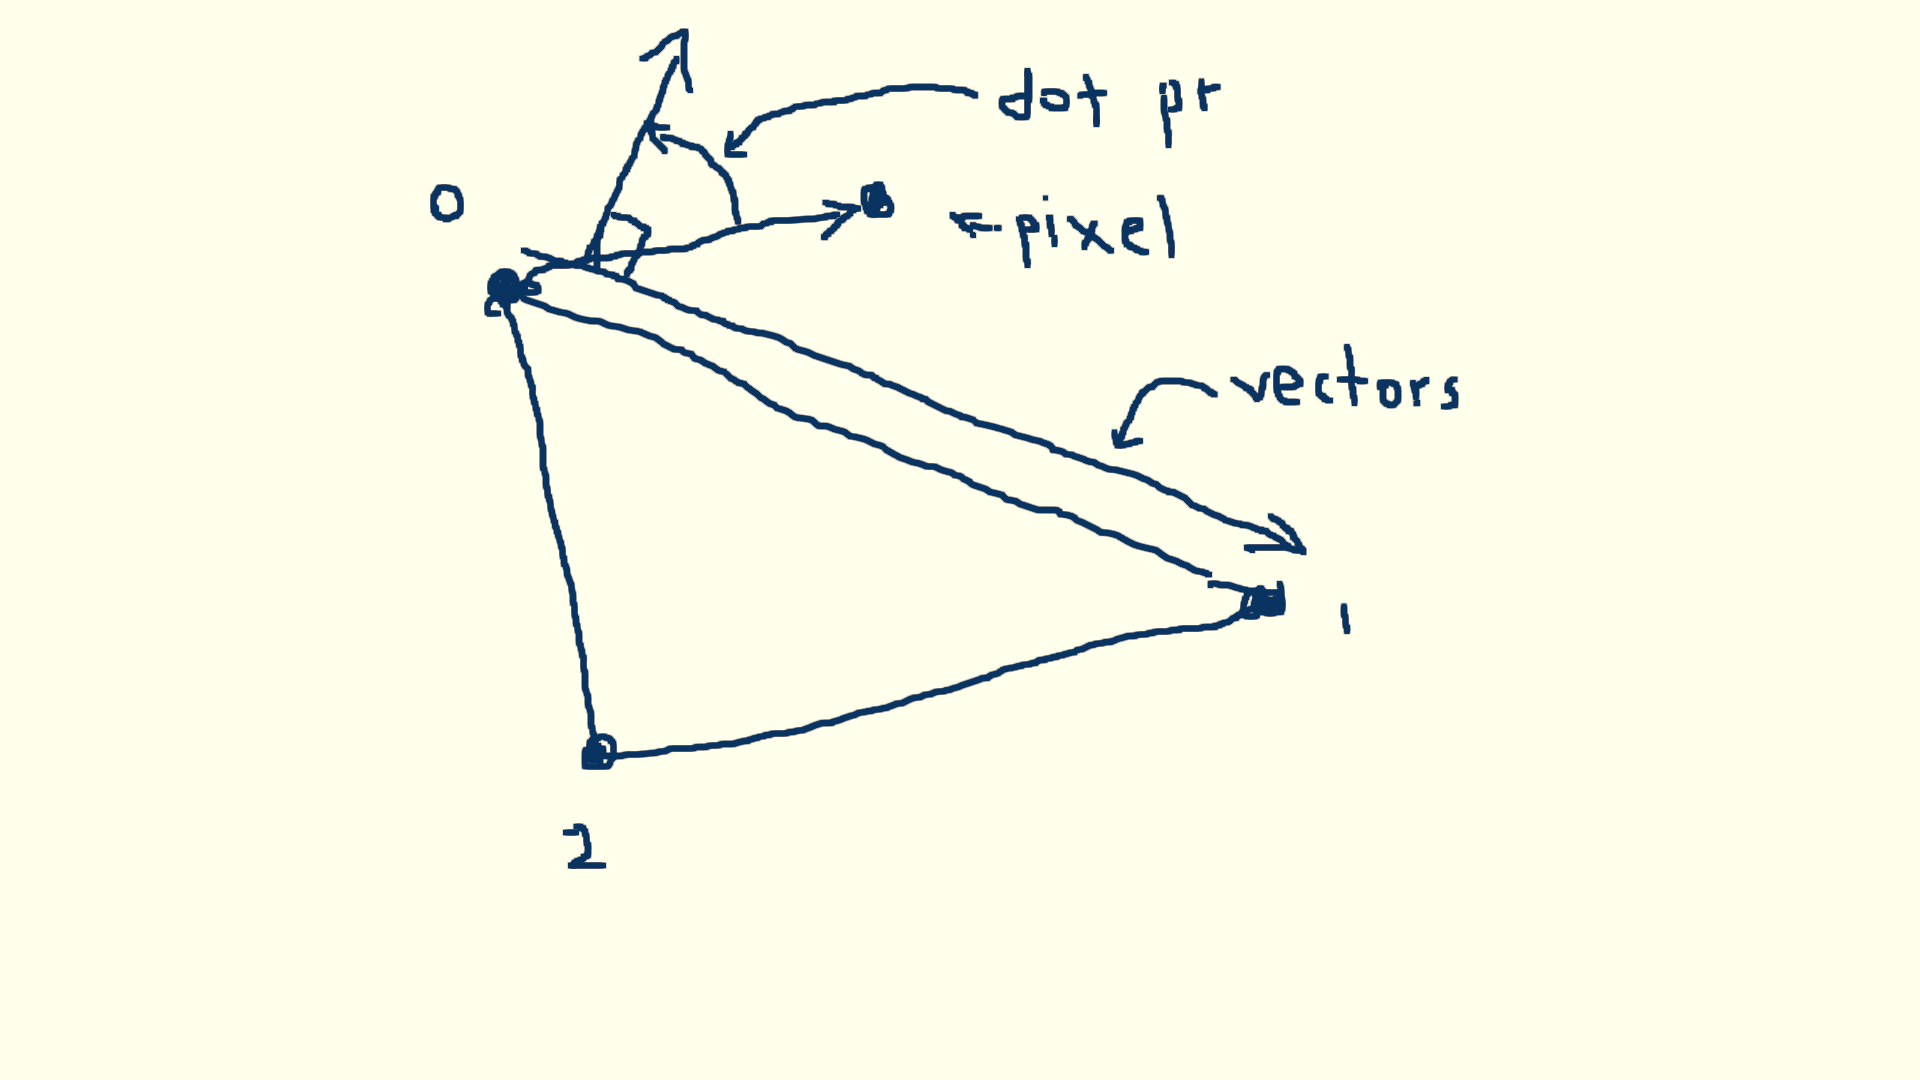
right-click and view image.
Step 5 (optional)
This is an optional exercise in pseudocode conversion.

The pseudocode below fills a triangle using Odd-Even rule.

Determine if point at x, y is inside a triangle.
Use a horizontal line from (x,y) to (infinity,y).
Does line intersect any triangle sides?

notes: vert is a triangle_vertex from g.tri[3]
       a <-- b  means assign b to a

Use the pseudocode below to make this work.

set pixel color to blue
n <-- 0
i <-- 0
while (i < 3) do
    p0 <-- i
    p1 <-- (i+1) mod 3
    ydiff <-- (vert[p1][1] - vert[p0][1])
    if ydiff < 0 then
        SWAP p0 and p1
    end-if
    if y >= vert[p0][1] and y < vert[p1][1] then
        ydiff <-- (vert[p1][1] - vert[p0][1])
        xdiff <-- (vert[p1][0] - vert[p0][0])
        if xdiff not 0 then
            //slope = rise/run
            slope <-- ydiff/xdiff
            //x intersect is difference in y divided by the slope
            xintersect <-- (y - vert[p1][1]) / slope
            if (xintersect + vert[p1][0]) ≥ x then
                increment n
            end-if
        end-if
    end-if
    i <-- i+1
end-do
//odd number indicates inside
if n is odd then
    set pixel color to yellow
end-if
drawPoint(x,y);

--end of pseudocode--
Step 6
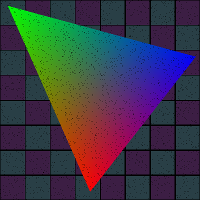
Fill a triangle using barycentric coordinates.
Heron's formula for triangle area!
You will probably need to write functions such as...
Flt getLength(Vec p1, Vec p2);
Flt getTriangleArea(Vec p1, Vec p2, Vec p3);
bool getBarycentric(Vec tri[3], int x, int y, Flt *u, Flt *v);
Use the u, v, w components to derive the color of each pixel
in the triangle.
Your triangle will be shaded like this...
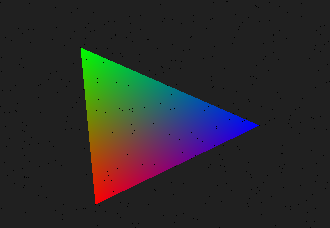 On Monday we will get the blended triangle on the screen together.
Insert these three functions into your lab3.cpp program.
double getLength(double p1[2], double p2[2])
{
double dx = p1[0] - p2[0];
double dy = p1[1] - p2[1];
return sqrt(dx*dx + dy*dy);
}
double triangleArea(double tri[3][2])
{
//get side lengths
double a = getLength(tri[0], tri[1]);
double b = getLength(tri[1], tri[2]);
double c = getLength(tri[2], tri[0]);
double s = (a+b+c) / 2.0;
return sqrt(s * (s - a) * (s - b) * (s - c));
}
bool getBarycentric(double t[3][2], double *pt, double *u, double *v)
{
//main triangle is already built in t.
//build sub-triangle st1
double st1[3][2] = { t[0][0],t[0][1], t[1][0],t[1][1], pt[0],pt[1] };
//build sub-triangle st2
double st2[3][2] = { t[1][0],t[1][1], t[2][0],t[2][1], pt[0],pt[1] };
double areaMain = triangleArea(t);
double areaSub1 = triangleArea(st1);
double areaSub2 = triangleArea(st2);
*u = areaSub1 / areaMain;
*v = areaSub2 / areaMain;
return ((*u + *v) <= 1.0 && *u >= 0.0 && *v >= 0.0);
}
Place them just above the physics() function.
Get your mode 9 in-place in your code.
To start this yourself...
1. define in global: double tri[3][2];
2. in check_keys for key 9, generate 3 random points in your g.tri array.
3. in render:
check for mode 9
put x,y in double pt[2] array
call getBarycentric function
if it returns true,
double w = 1.0-u-v
scale u,v,w by 255.0
use scaled u,v,w as the colors for the pixel
you are done
We will do the steps above together in class.
Extra credit if you get this working on your own, over the weekend.
On Monday we will get the blended triangle on the screen together.
Insert these three functions into your lab3.cpp program.
double getLength(double p1[2], double p2[2])
{
double dx = p1[0] - p2[0];
double dy = p1[1] - p2[1];
return sqrt(dx*dx + dy*dy);
}
double triangleArea(double tri[3][2])
{
//get side lengths
double a = getLength(tri[0], tri[1]);
double b = getLength(tri[1], tri[2]);
double c = getLength(tri[2], tri[0]);
double s = (a+b+c) / 2.0;
return sqrt(s * (s - a) * (s - b) * (s - c));
}
bool getBarycentric(double t[3][2], double *pt, double *u, double *v)
{
//main triangle is already built in t.
//build sub-triangle st1
double st1[3][2] = { t[0][0],t[0][1], t[1][0],t[1][1], pt[0],pt[1] };
//build sub-triangle st2
double st2[3][2] = { t[1][0],t[1][1], t[2][0],t[2][1], pt[0],pt[1] };
double areaMain = triangleArea(t);
double areaSub1 = triangleArea(st1);
double areaSub2 = triangleArea(st2);
*u = areaSub1 / areaMain;
*v = areaSub2 / areaMain;
return ((*u + *v) <= 1.0 && *u >= 0.0 && *v >= 0.0);
}
Place them just above the physics() function.
Get your mode 9 in-place in your code.
To start this yourself...
1. define in global: double tri[3][2];
2. in check_keys for key 9, generate 3 random points in your g.tri array.
3. in render:
check for mode 9
put x,y in double pt[2] array
call getBarycentric function
if it returns true,
double w = 1.0-u-v
scale u,v,w by 255.0
use scaled u,v,w as the colors for the pixel
you are done
We will do the steps above together in class.
Extra credit if you get this working on your own, over the weekend.
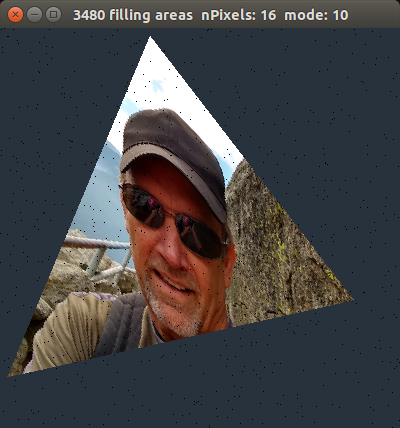
Step 7
Fill a triangle with your picture from lab-1.
(or other image)

Bring in the get_image_stream function from your lab1.cpp.

Use barycentric coordinates of each pixel generated to get a color
from your Image data stream.

  1. use 3-half spaces to determine if pixel inside triangle
  2. generate barycentric coordinates for the pixel
  3. use u,v,w to scale each of the 3 (x,y) coordinates on your image.
  4. the sum of the scaled values will be the location of your color.
  5. go get the rgb color from the data stream.

sample image...


Extra effort:
Randomly generate all triangle vertices, but your triangle must
occupy at least 1/3 of the window area.

This gives you a bigger triangle to see your picture.
Extra effort:
Randomly generate all triangle vertices, but your triangle must
occupy at least 1/3 of the window area.
This gives you a bigger triangle to see your picture.
Step 8 (optional)
Fill a parallelogram with your picture from lab-1.
(or other image)

1. Generate a random triangle as before.
2. Add a 4th point to form a second triangle. (triangle mesh)
3. The triangles together should form a perfect parallelogram.
4. Map your entire image to the parallelogram.

sample image...
Step 9
Lab-3 images from a previous student are below.
Choose one or more images and try to duplicate them.
Make new menu items that will display your art.
Perlin Noise
We will render Perlin Noise together.

Lodev.org page


Later, you may use the functions below to enhance your program.
Put an interesting perlin texture on a disk, ring, triangle, checkboard, etc.

float turbulence(float pos[], float pixel_size)
{
    extern float noise2(float vec[2]);
    float x = 0.0;
    float scale = 1.0;
    while (scale > pixel_size) {
        pos[0] = pos[0] / scale;
        pos[1] = pos[1] / scale;
        x = x + noise2(pos)*scale;
        scale = scale / 2.0;
    }
    return x;
}

void marble(float pos[], float rgb[3])
{
    float x = sin((pos[1]+3.0*turbulence(pos,0.0125))*3.14159);
    x = sqrt(x+1)*.7071;
    rgb[1] = .3+.8*x;
    x = sqrt(x);
    rgb[0]= .3 + .6*x;
    rgb[2]= .6 + .4*x;
}


Call the functions in your case-statement like this:

//Perlin noise
extern float noise2(float vec[2]);
float turbulence(float vec[2], float size);
void marble(float pos[], float rgb[3]);
setColor3i(250,250,250);
float vec[2] = { (float)x/140.0f, (float)y/140.0f };
float rgb[3];
marble(vec, rgb);
setColor3i((int)(rgb[0]*256.0), (int)(rgb[1]*256.0), (int)(rgb[2]*256.0));
drawPoint(x, y);

A lot of textures and effects can be done with Perlin noise.
What to turn in...
Your instructor will find your work out on Odin server.