Presentation
This page serves as a representation of the progress I was able to achieve in my project, relative to the goals I set on the homepage. The scope of the project was reduced a fair bit from the original lofty goals I had set. Instead of trying to create full systems for every part of a simplistic RPG, I reduced my goals to focus on the world creation and interacting with it as the player. Key ideas in my project that relate to the course is how I handle synchronizing physics, collision detection, and audio handling.
TMX Files
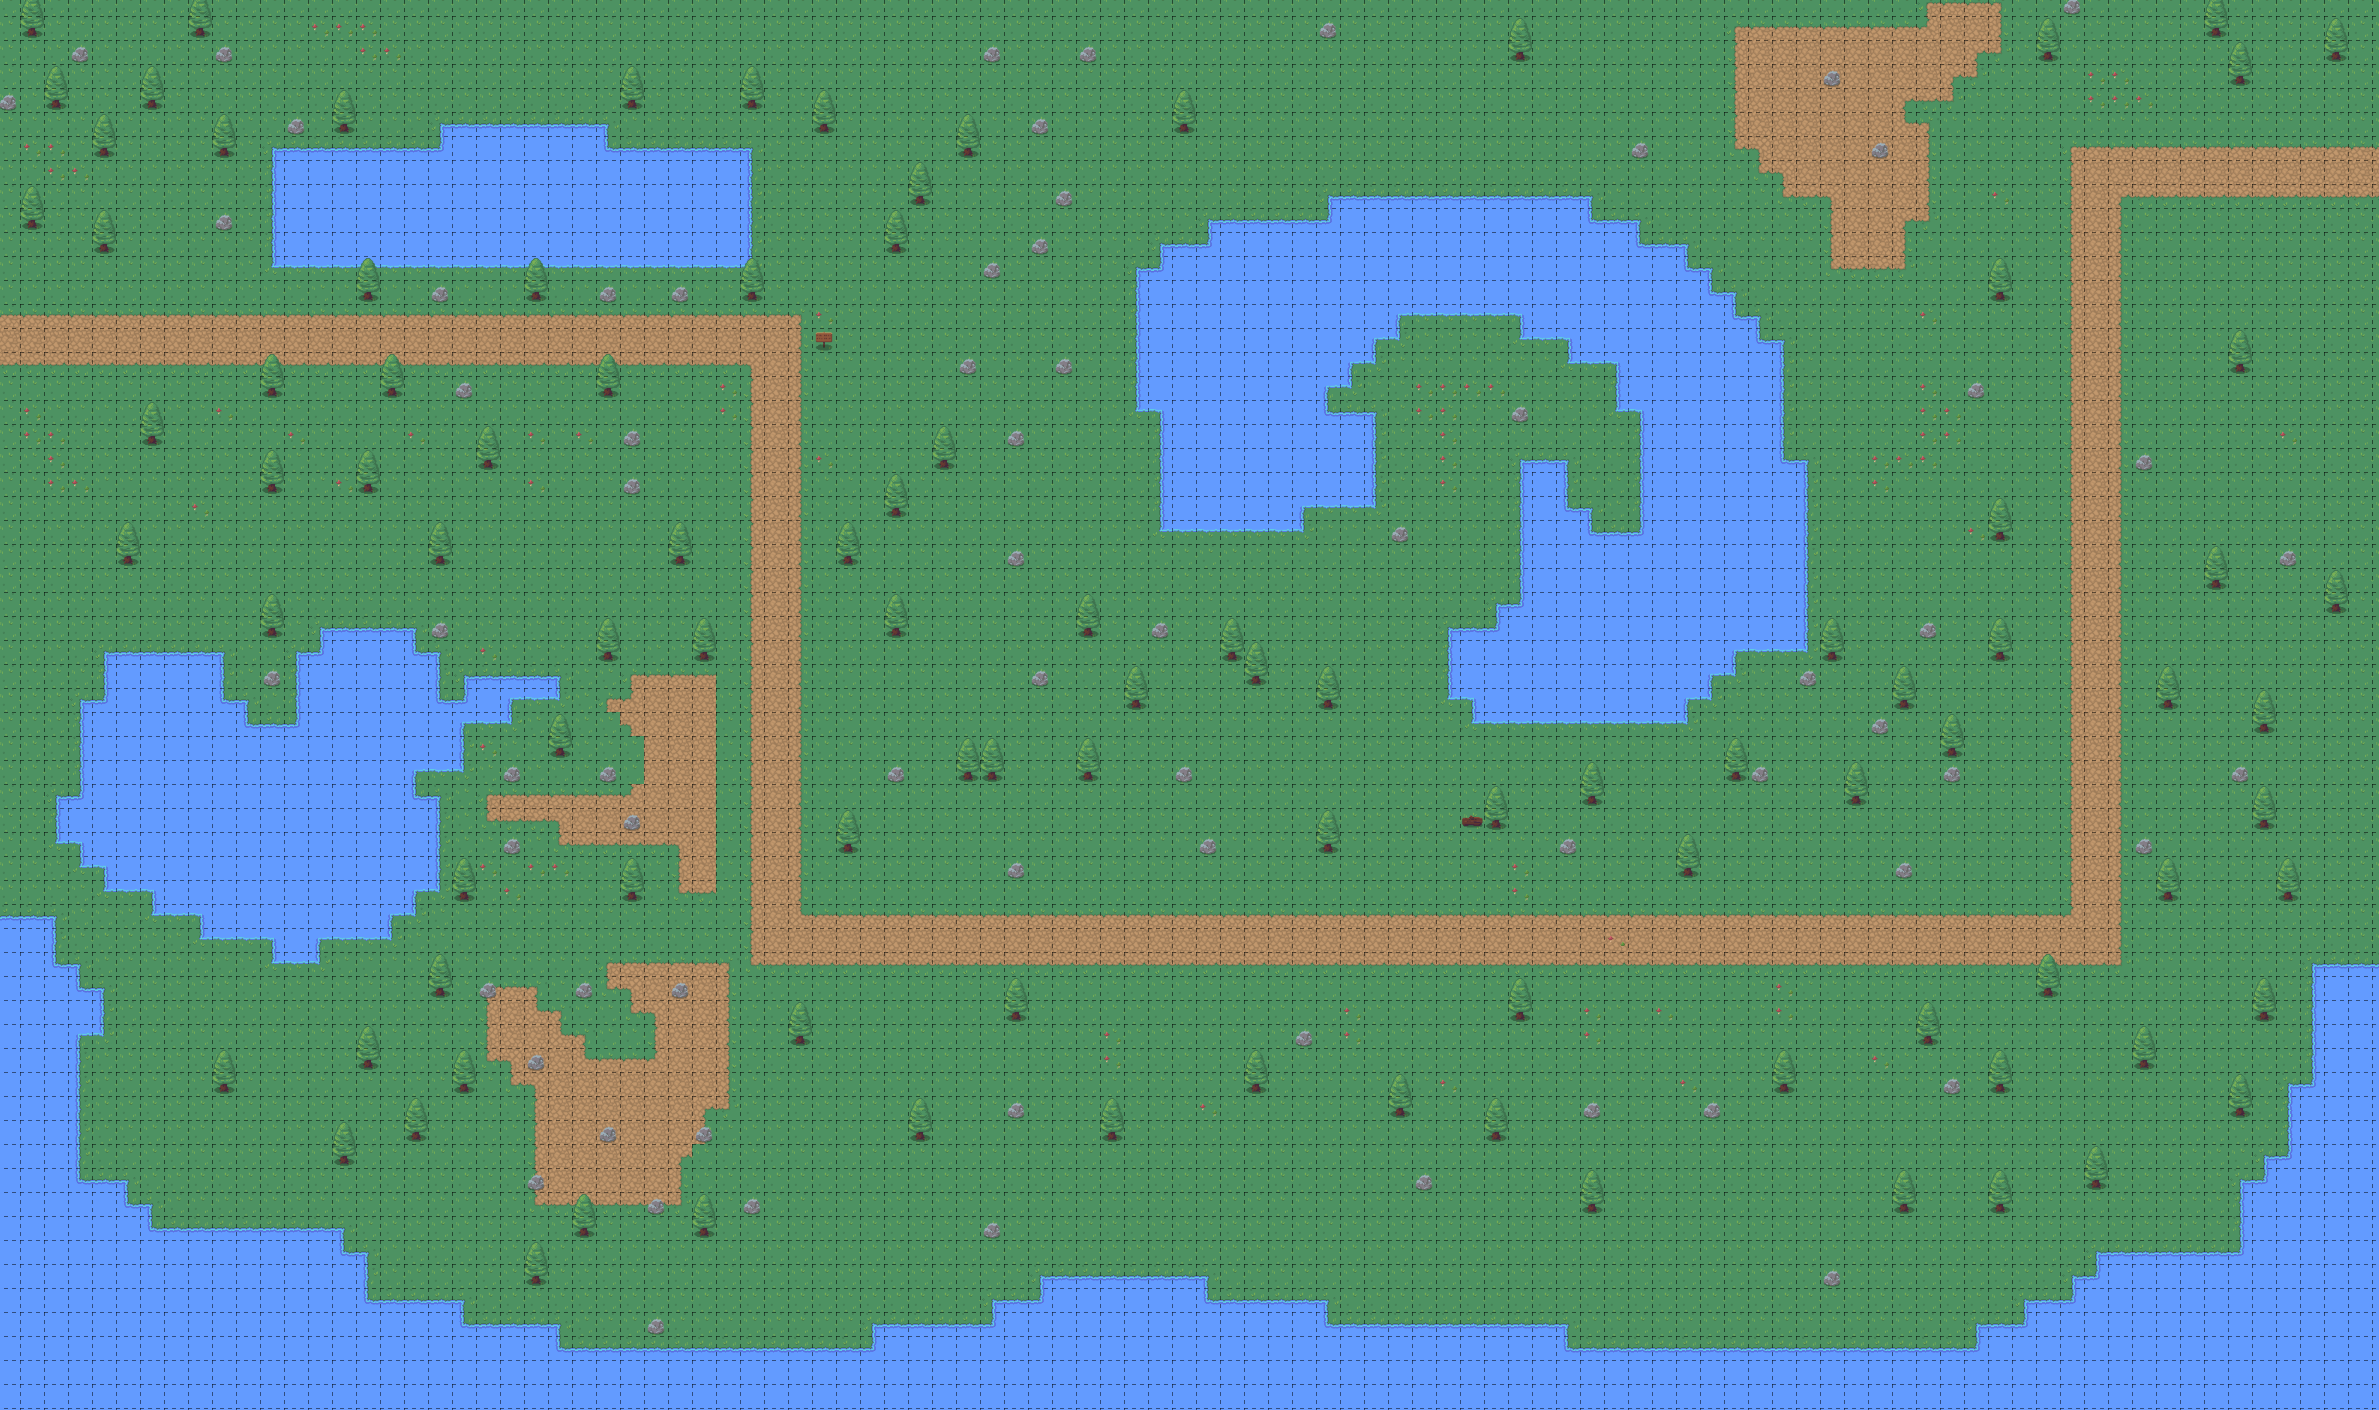
The first major part of my project was world building in the literal sense. With that came a lot of questions about reasoning such as: how did I want to create the world, how did I want to render it, how would I load it, and so forth. Ultimately, I decided on using TMX files. The basic idea of what I was doing was taking open source tile sheets, then using a program called Tiled to create tilemaps. The tilemaps were then saved as TMX files. From there, I had to import the TMX file into my program to determine how to render the map using the tilesheet. A good analogy is Tiled was a different version of Blender that plays better with tilesheets for texturing.

TMX files are essentially just XML files albeit with a lot more numbers representative of texturing and locations. Seen to the left is the TMX file representing the town tilemap, with the tilemap itself being shown above.
Scene Switching
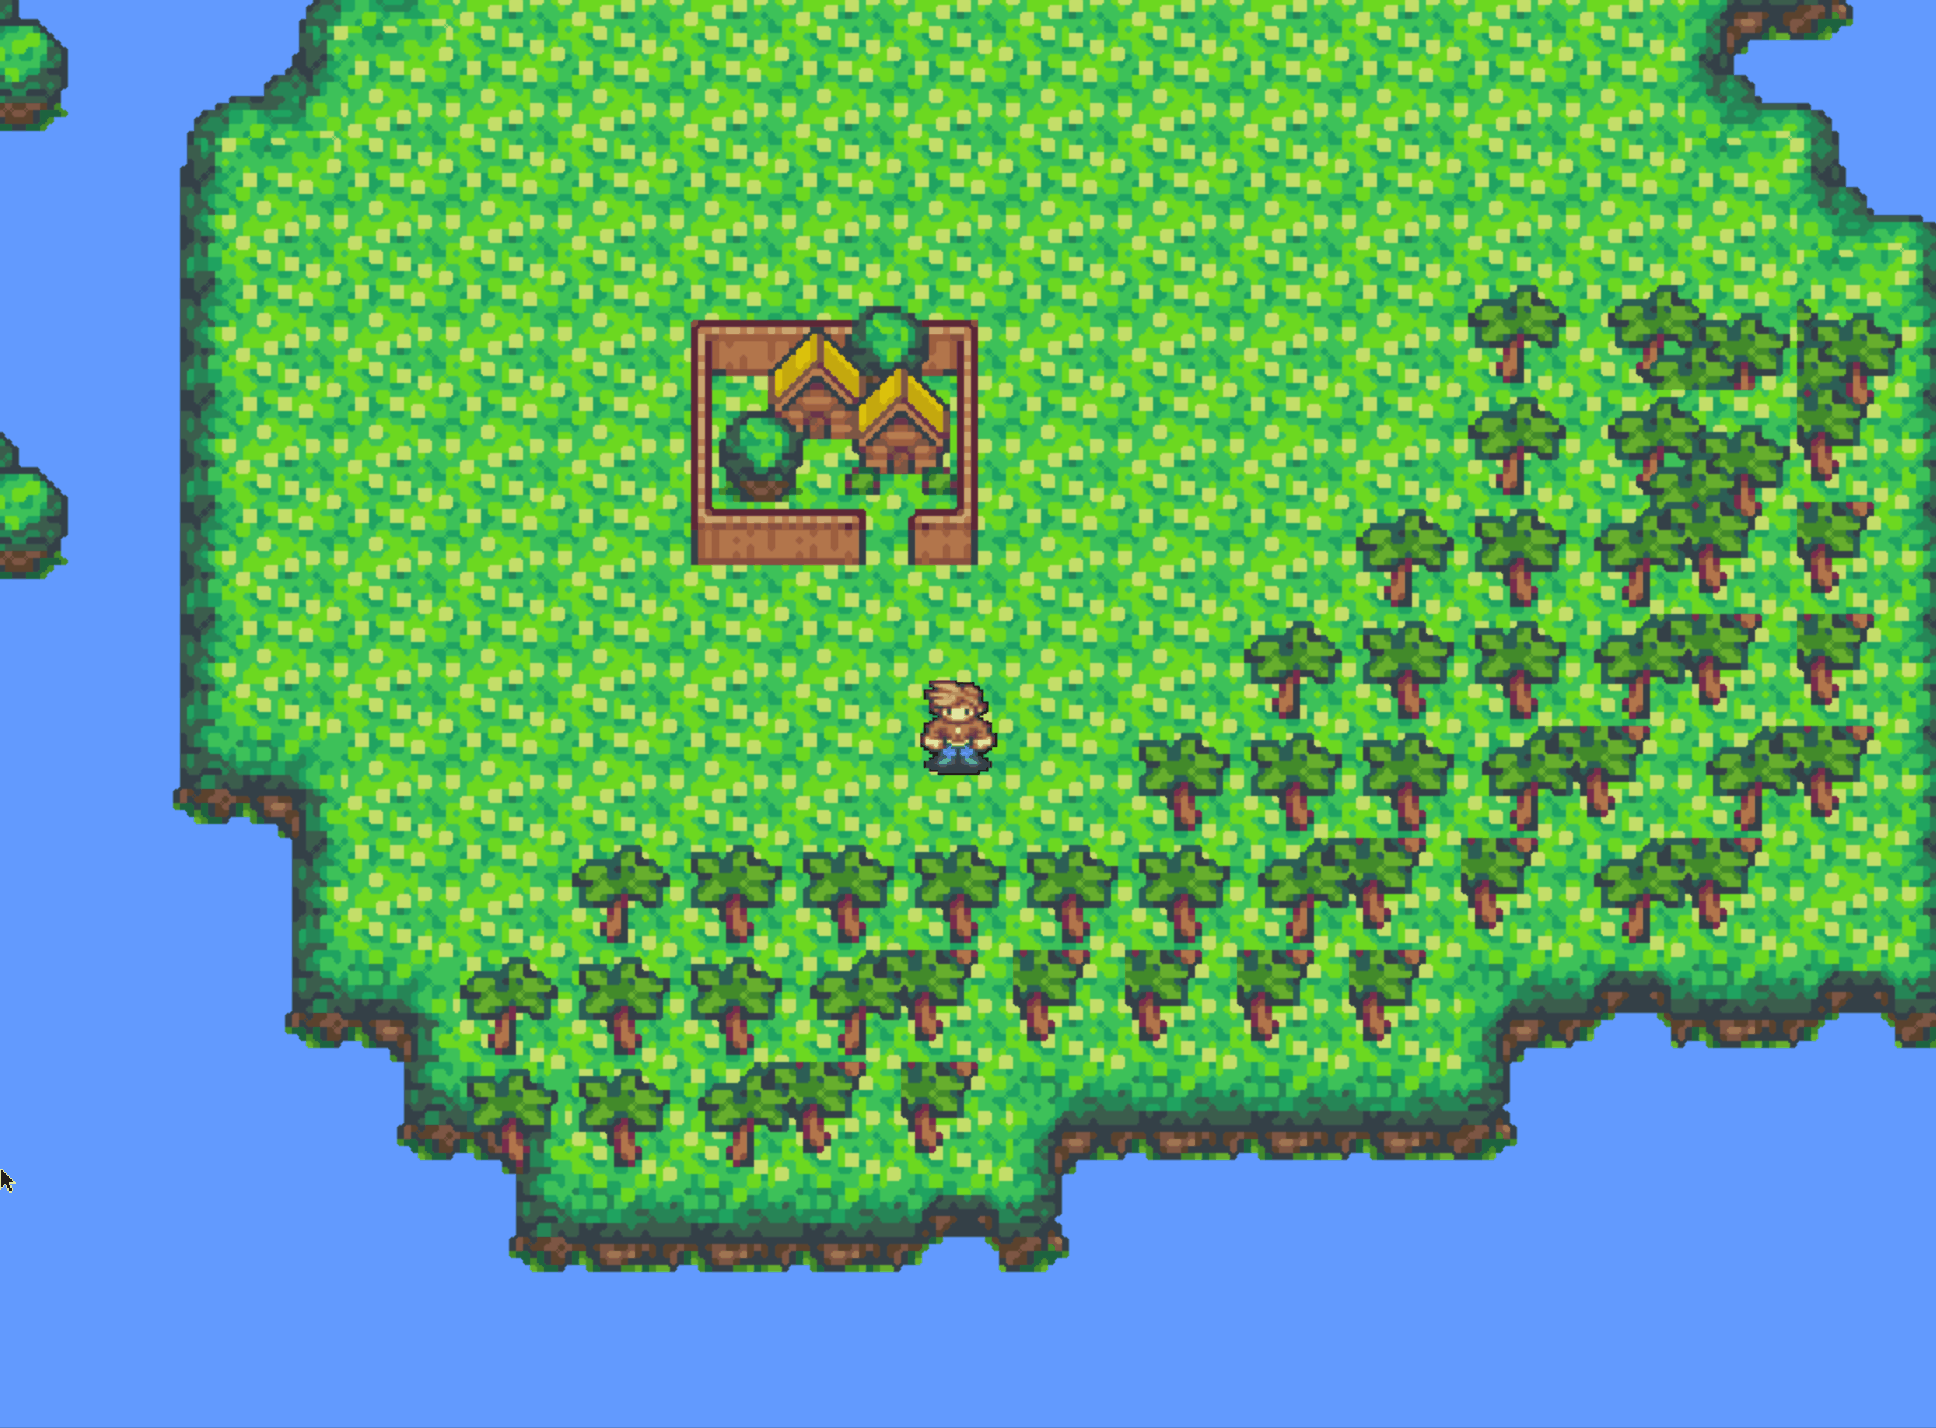
Scene switching was inarguably the hardest part of the logic I had to figure out. The rough idea of what I was trying to do was create points on both maps associated with one another where if interacted with (by movement in this case) would stop rendering the current scene, enter a transition (the dark blue coloring) to allow for loading, save the current information about the game, and then call the new scene with the player being rendered at the connection point. With the wordy part out of the way, the simple explanation is I needed to pass info between states and make sure it was retained correctly, which proved difficult.
On the right is the prime example of how scene switching works in my project. It starts out with the player traversing the overworld map. When the game detects the player has moved onto the connection point, or portal, as it's deemed in my code, the game then initiates the scene transition. The reverse is then scene when the player exits the town map.
Collision
Collision was one of the more interesting parts of the project. Since I was reading in TMX files to determine how to render scenes, there wasn't definite answers for where objects such as trees or coastlines existed in the scene. Instead of working backwords to undo work I had already finished, I instead leaned a step further into the TMX file, and inserted hidden objects on every tile where I wanted player interaction. Once that was completed, I could read in the exact location of these objects, and implement collision checking. For simplicity, I used a bounding box approach for collision with each tile being considered the bounding box.
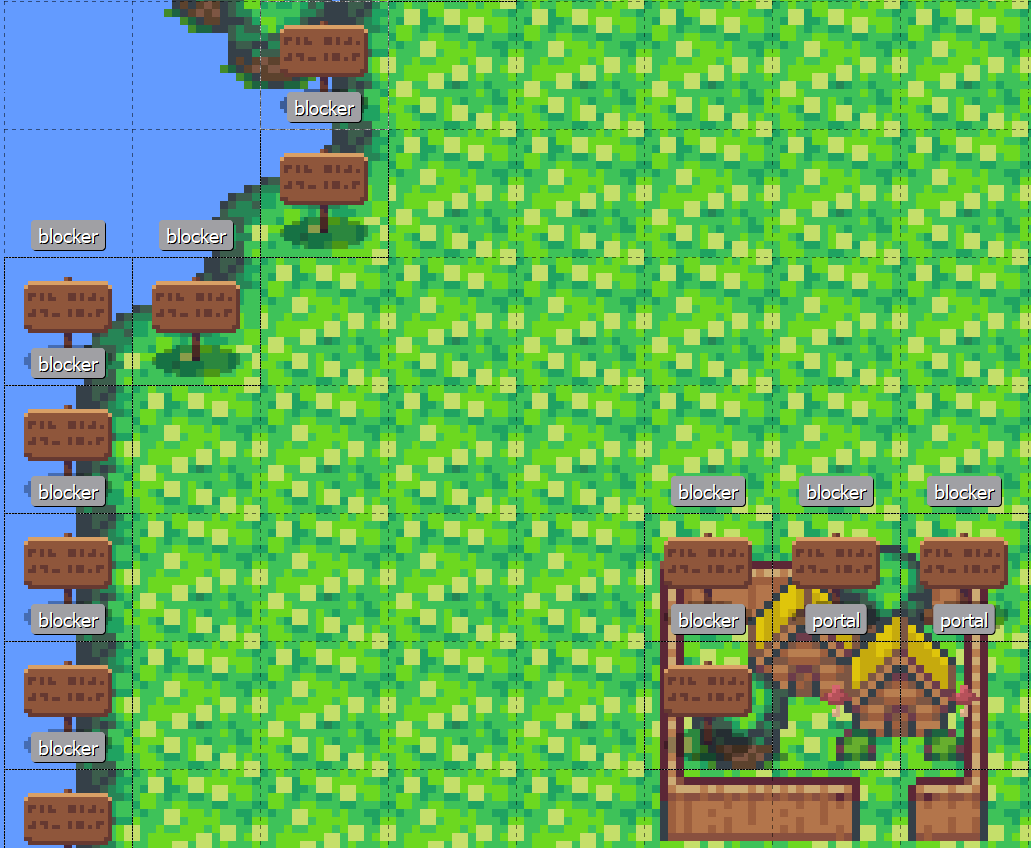
On the left can be found a screenshot of a portion of the overworld with the hidden layer being displayed as a representation for how the game logically handles the collision. Blockers represent where the player cannot path. Portals represent where scene switching occurs. The shapes of both objects are meerly placeholders as they're never rendered.
Sprite Animation
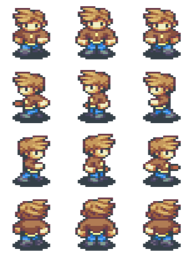
Sprite animation can be fairly unique in a pure 2D scene. Particularly with more retro-styled games such as ones I was attempting to model my own after, rather than having to render pixel by pixel to try and simulate movement animations, you can instead use a sprite sheet and flip through the images from it to simulate the same effect. Stemming from this, I loaded in an open source sprite sheet and then assigned rows from the sprite sheet to the four cardinal directions of movement. From there, it flips through the row depending on the user's input based on an internal timer.
On the right is the sample sprite sheet I use to create movement animations for the player controlled character. The center column is used to represent the resting animation of the player. A demo of the sprite animation can be found in the scene switching gif above.
Audio
Audio ended up being one of the last minute additions to my project, as it was one of the simpler things to add, given how much I had to restrict my goals from their original aim. For the project, I have audio loaded in on the program start, and then associated with the scenes, using the filename as the key. One nice thing that came from all the headache of scene switching was I ultimately came at it with a very object oriented approach, with a generalized class for the different scenes. This setup made tracking which audio belonged to which scene very straight forward.
On the right is a very brief video showing off the audio in the game. When the scene switches to the town, the audio switches as well. Both tracks were open source.